2.2 Software |
Some software components will be necessary to use the RAYGUIDE API.
When installing the RAYGUIDE software it can be chosen which components will be copied to the computer. For developing purposes it is sufficient to install just the SDK component. The needed libraries and sample code will be available. But it is recommended to install the RAYGUIDE GUI as well because some settings and tests can easier be done then. See chapter
Installation and Startup
in the RAYGUIDE User Manual for details.It is recommended to copy the complete folder SDK to a place where you have write access (which is normally not the case in the standard folder). The folder contains all needed library DLLs, packed as NuGet packages; all sample projects have references to them, and you can be sure that the references are found if the complete SDK folder (rather than only the sample folder) is copied.
In this documentation the SDK NuGet packages and other resources are referenced using the standard installation path.
A development environment capable for .NET programming is needed. Visual Studio is recommended; all sample projects are created with Visual Studio 2022. The free Visual Studio Community Edition is sufficient.
The .NET 8.0 framework or newer is needed.
In case of using NuGet feature during installation, all packages of this version will be deployed to the RAYLASE NuGet repository C:\Program Files\RAYLASE\NuGet. The NuGet paths used by Visual Studio are automatically updated.
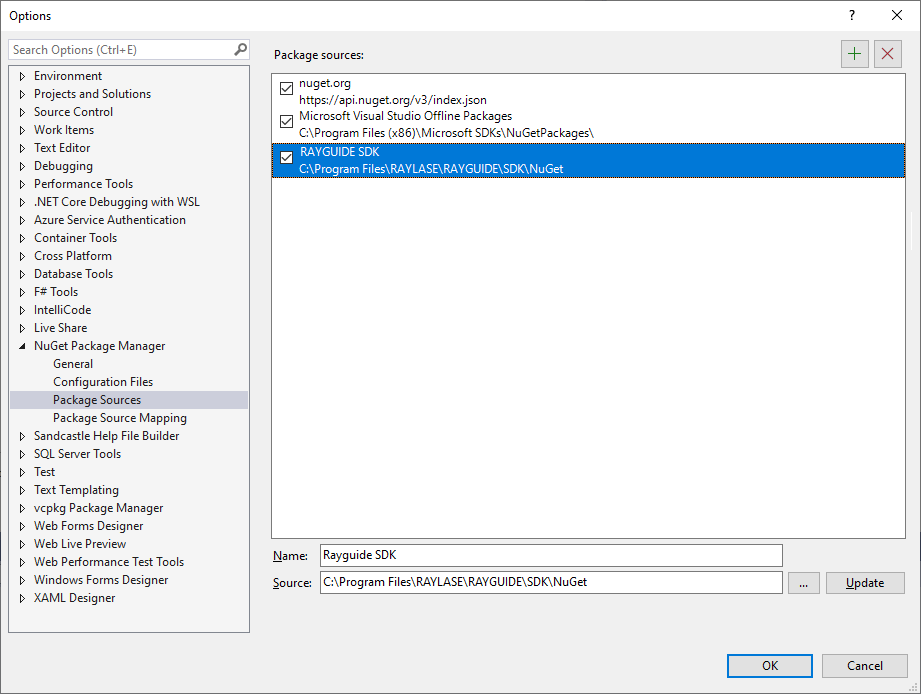
Otherwise Visual Studio has to be configuered manually. In a standard installation our packages can be found in folder C:\Program Files\RAYLASE\RAYGUIDE\SDK\NuGet. This folder must be added to Visual Studio's package sources:
Click on menu item Tools/Options... and open in the option dialog the element NuGet Package Manager/Package Sources. Add the path to our NuGetFolder there.
